master bedroom renovation / before & after
i am sooo excited to share our bedroom before & after with you! when we moved into this house, the master bedroom was not top of my priority list - in fact, in all four places we’ve lived the master is the only room we’ve never really touched in terms of renovations! so it was tiiiime to give our master some love. Foster sleeps in our bed (for nap times & bedtime) so i spend a dece amount in our room & i felt ready to LOVE the space.
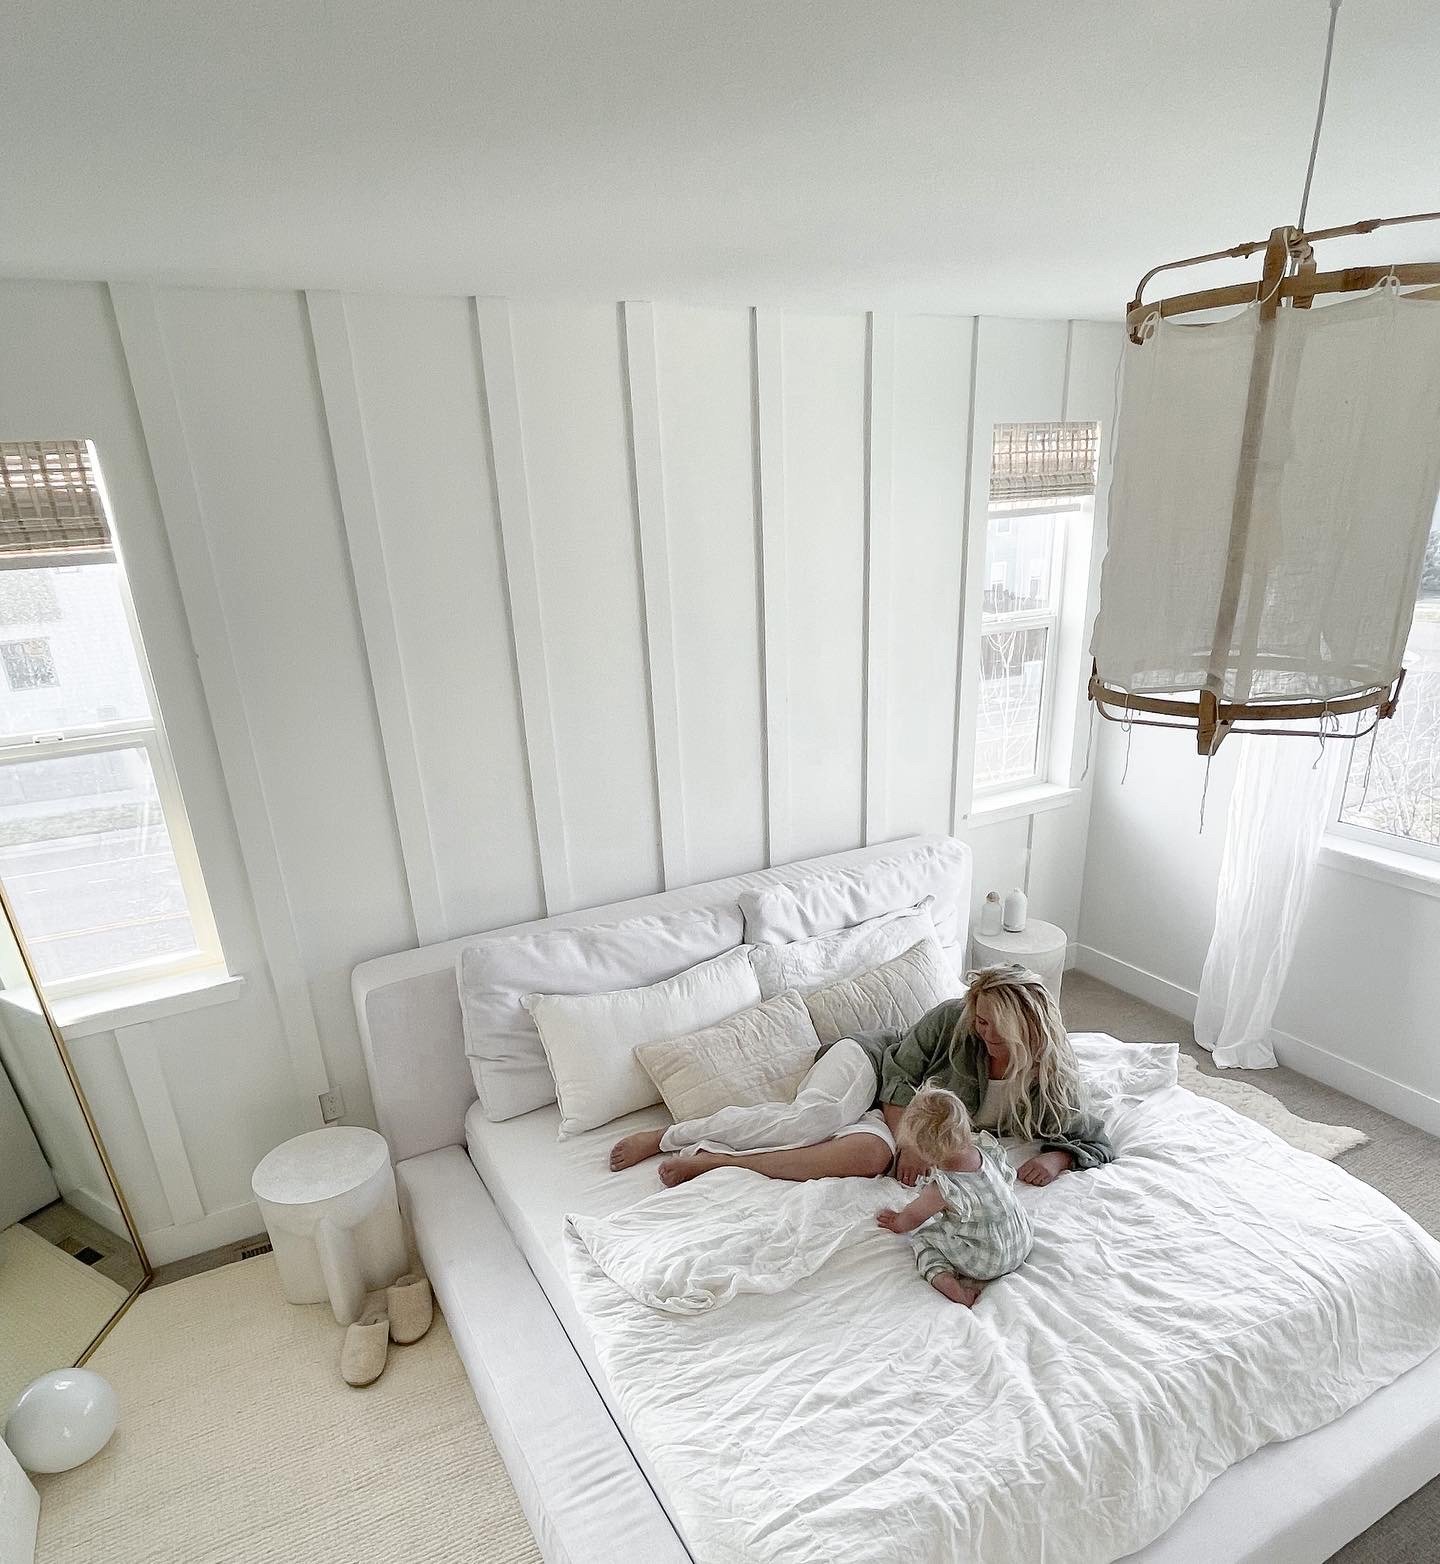
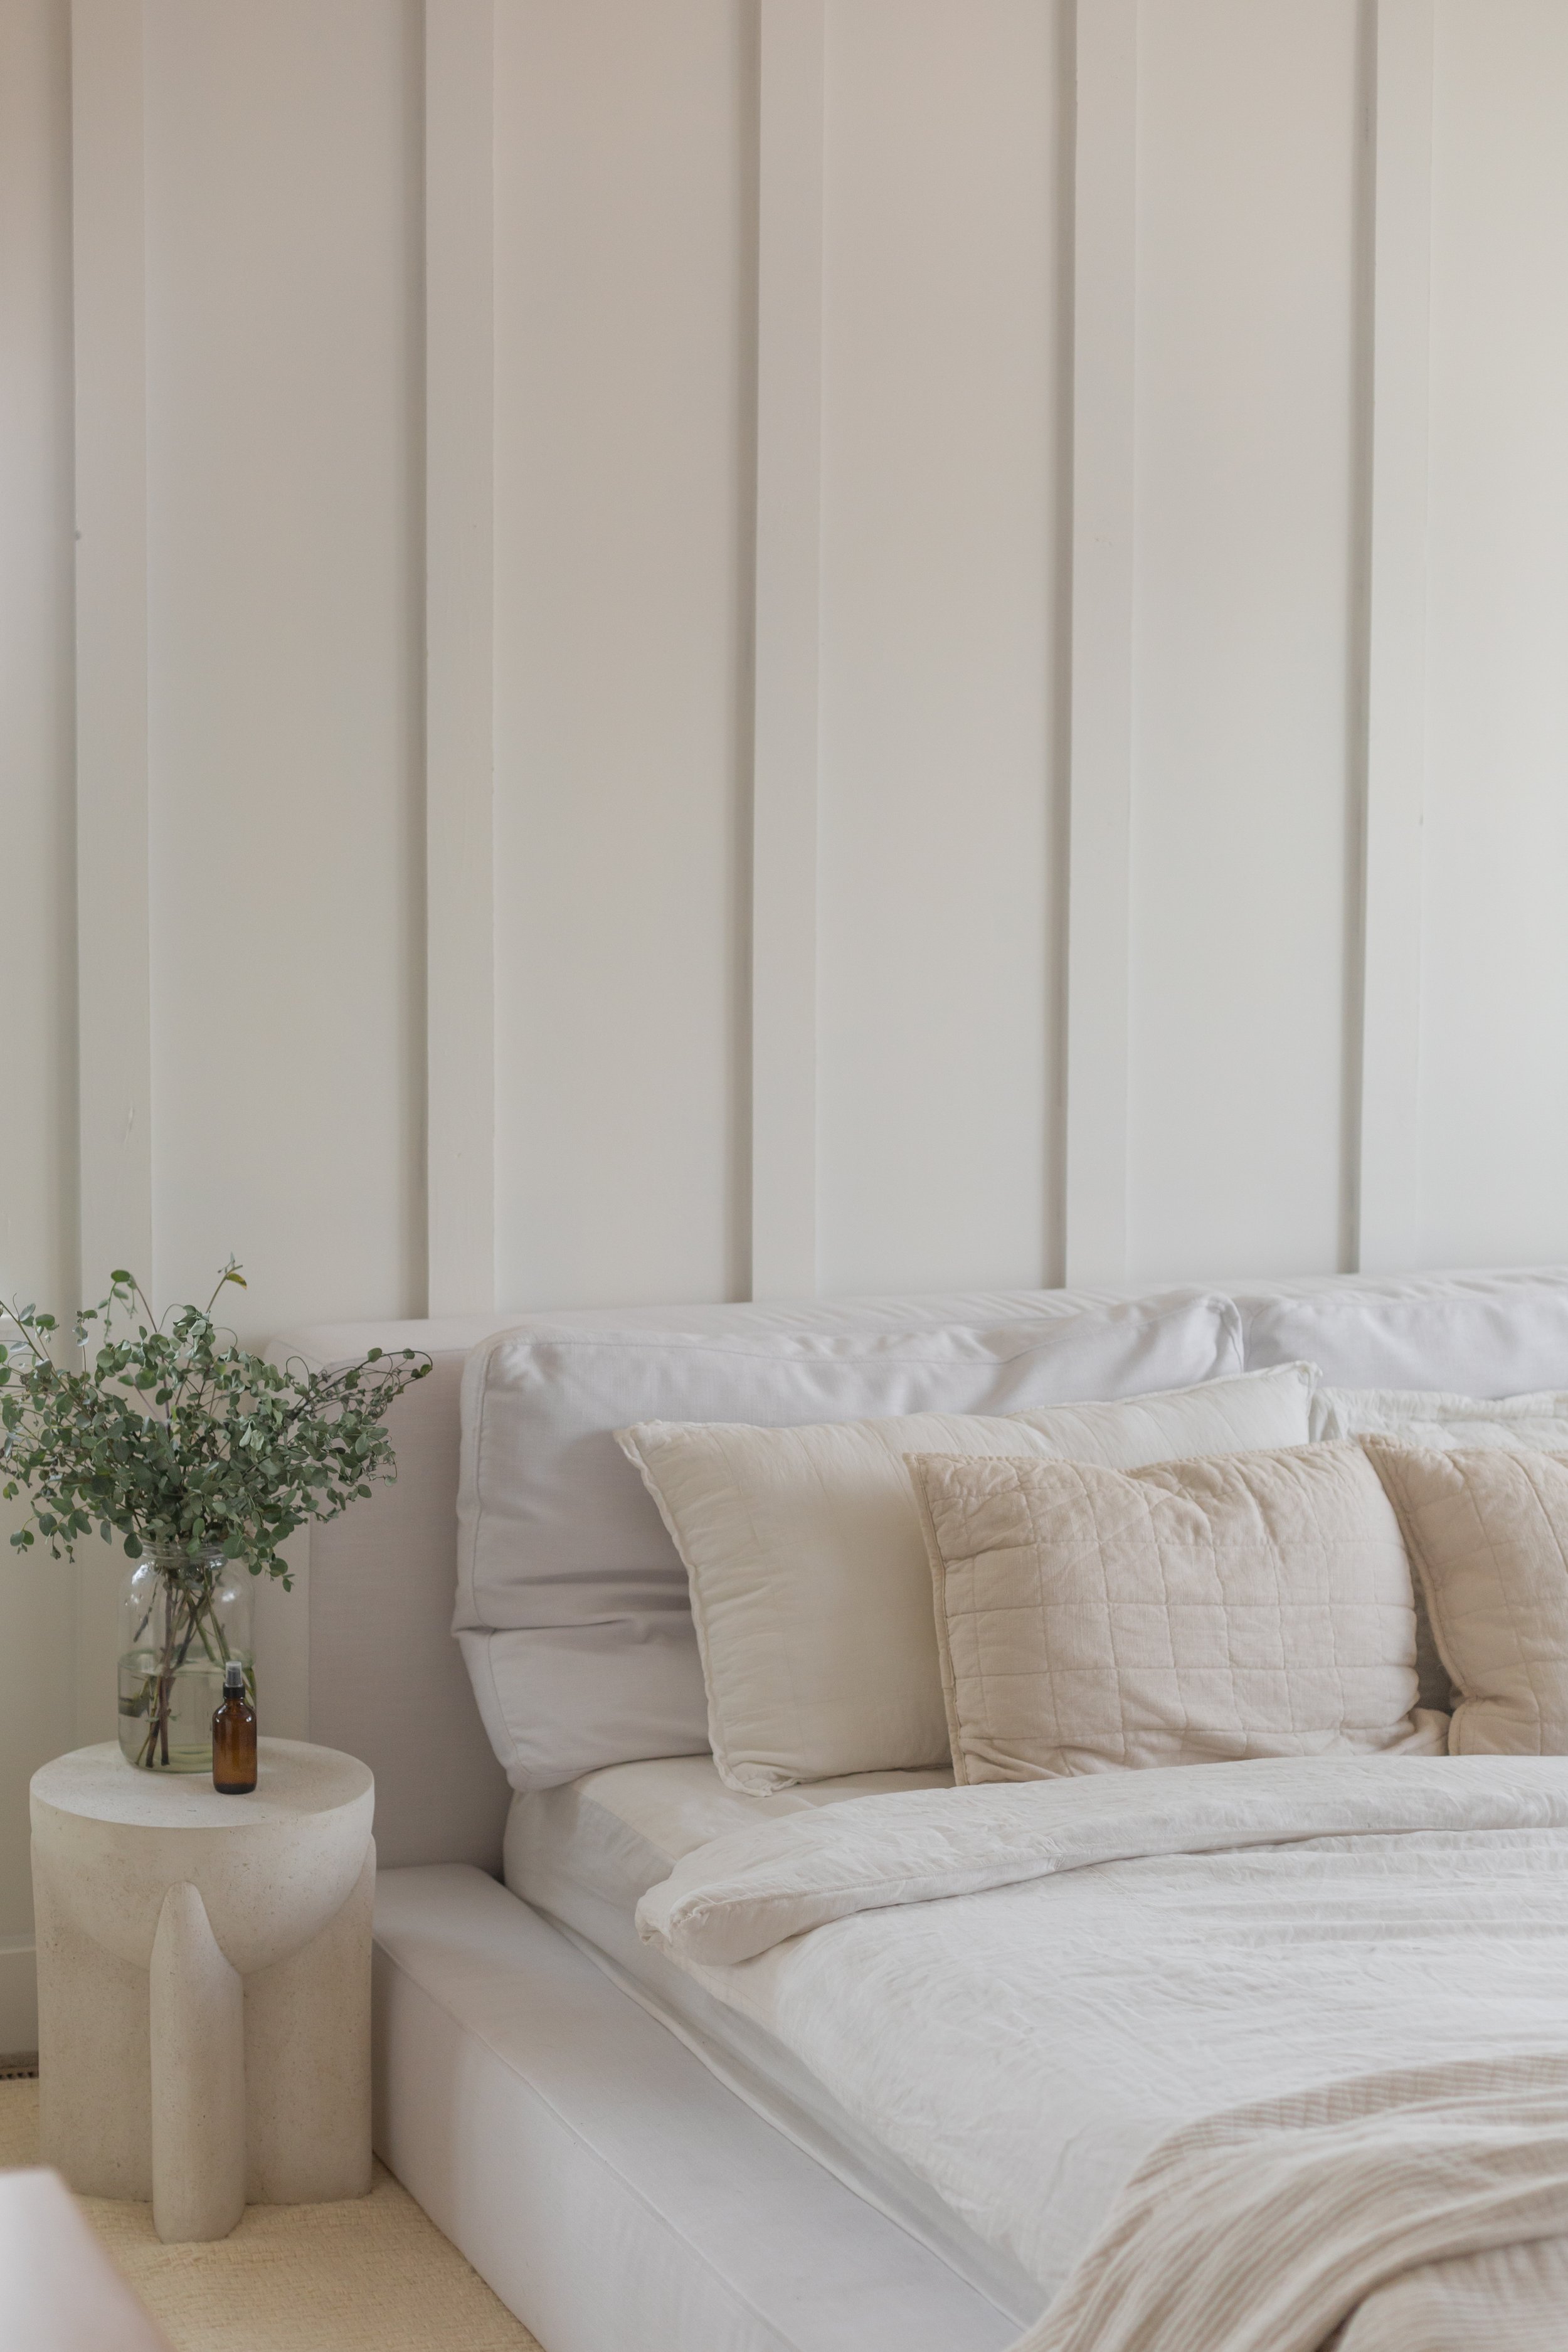
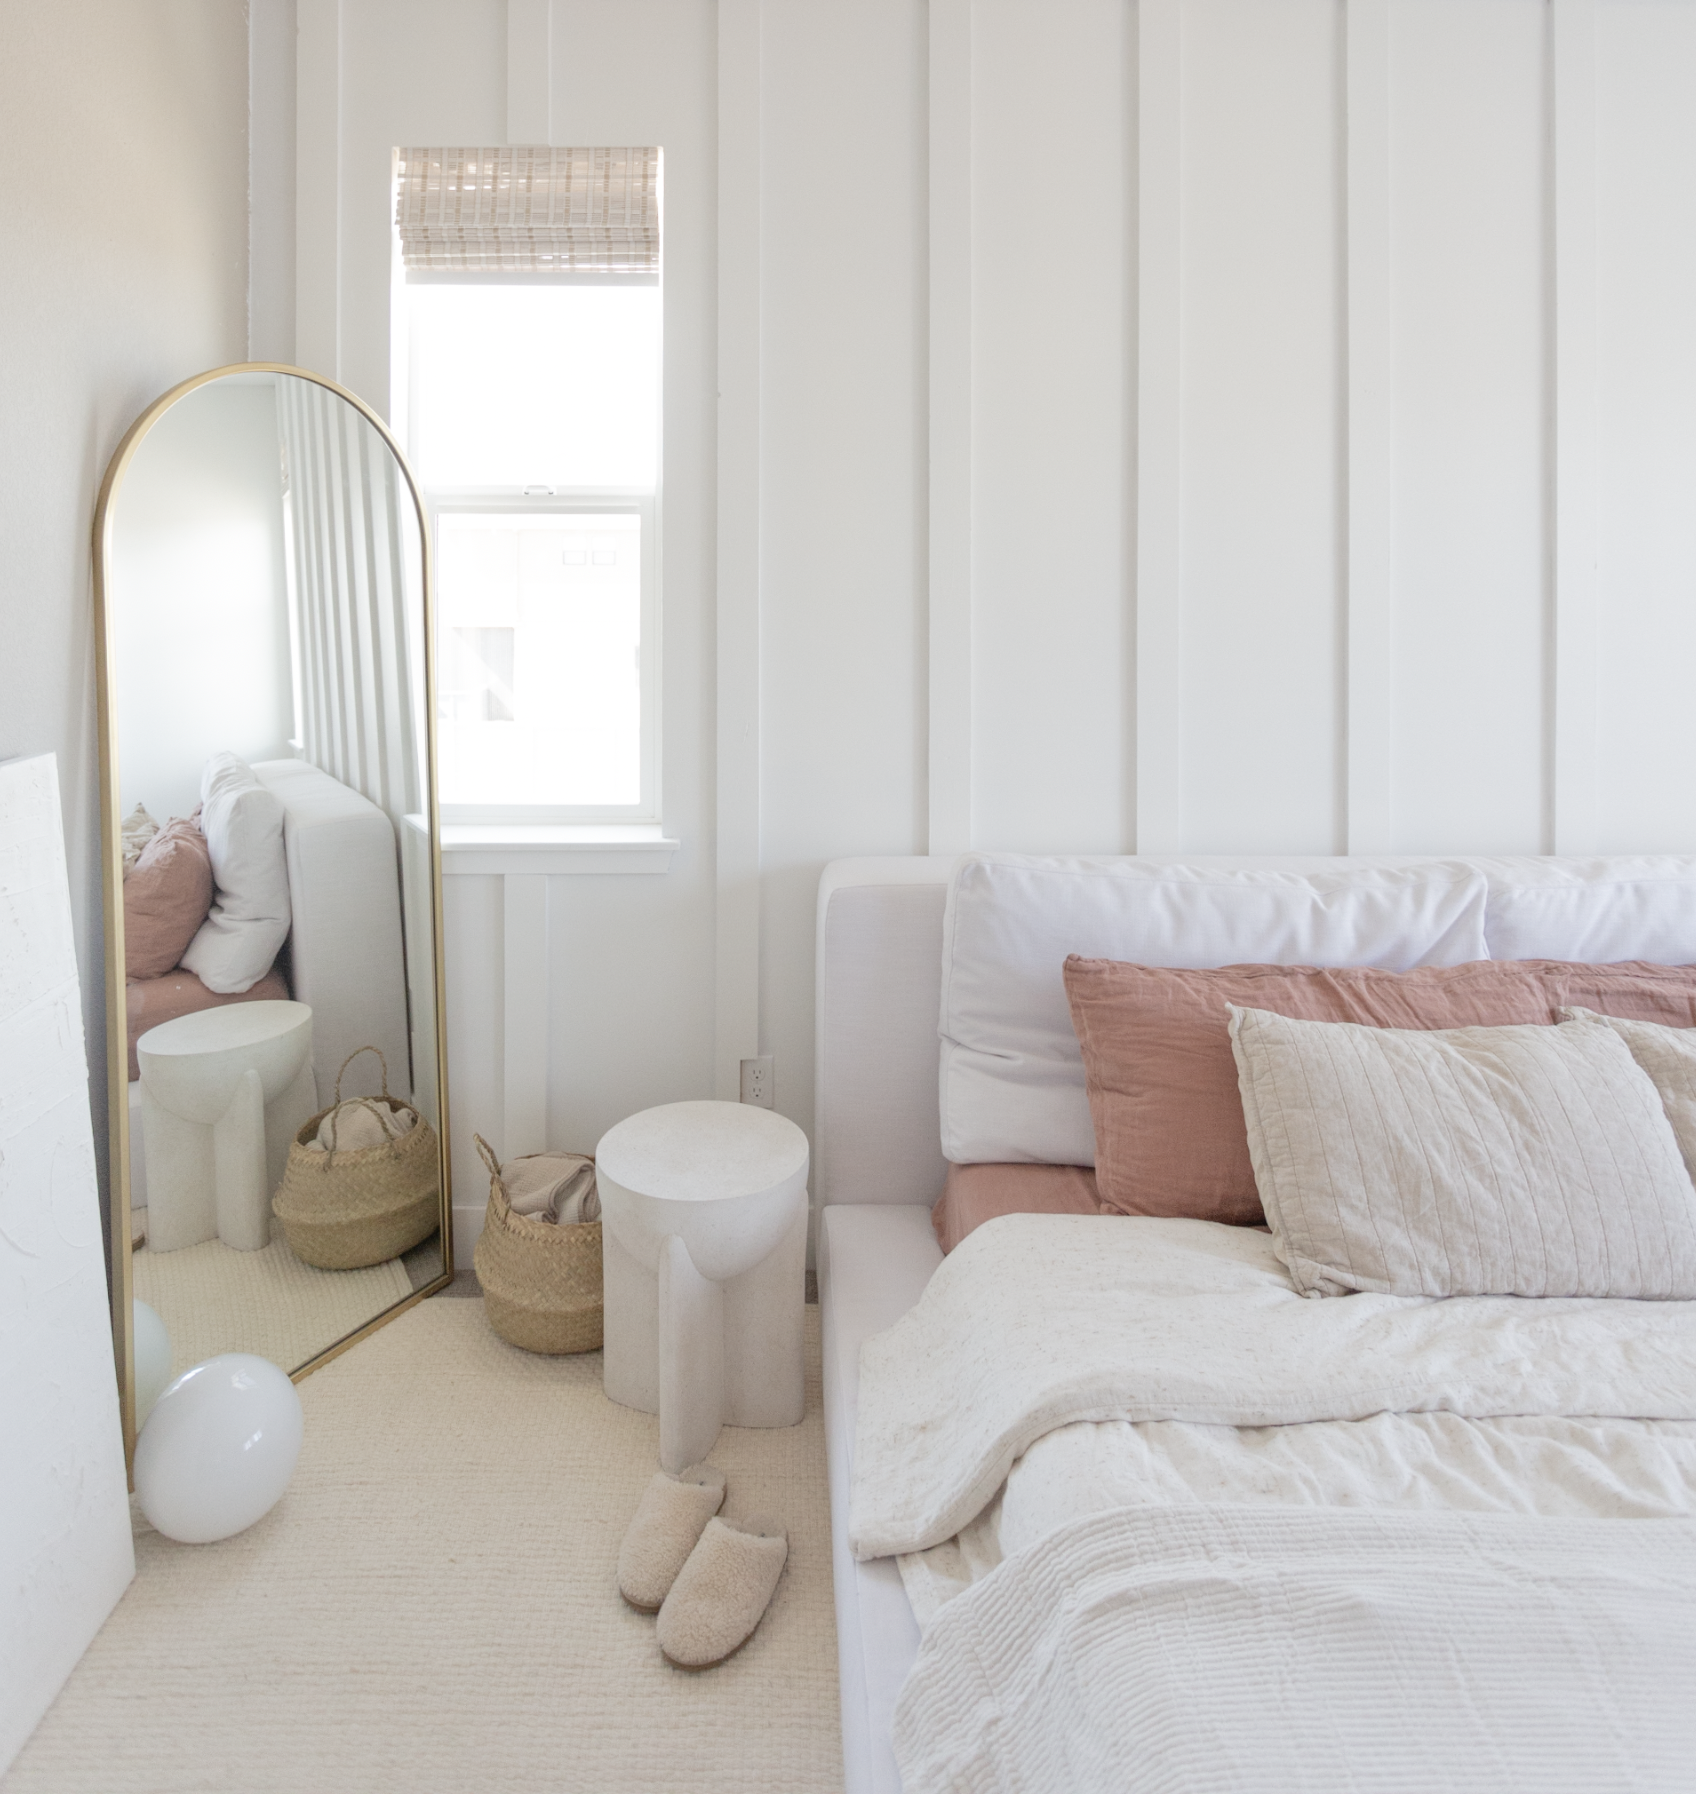
my one & only vision for this room: make it feel like you stepped into a cloud ☁
i think we succeeded! check out the before & after:
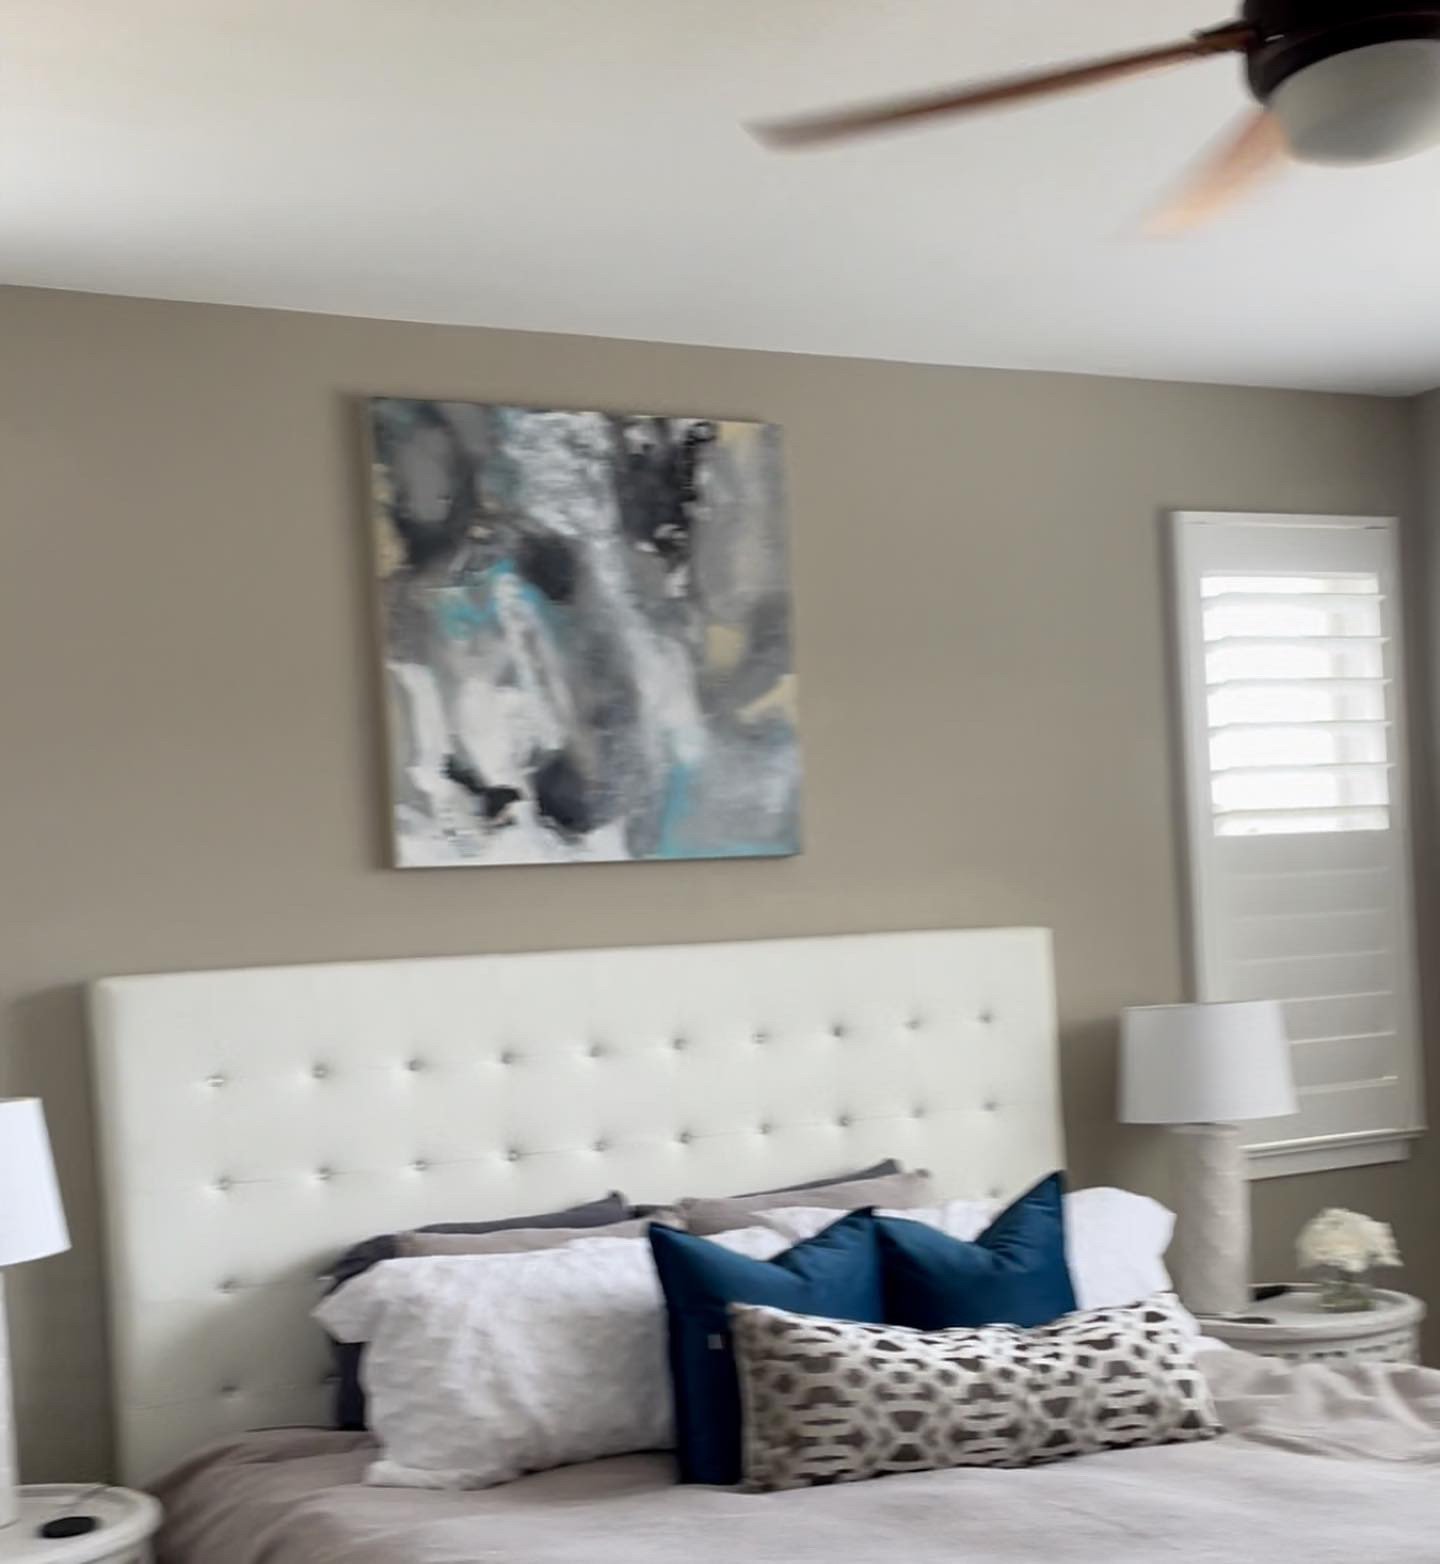
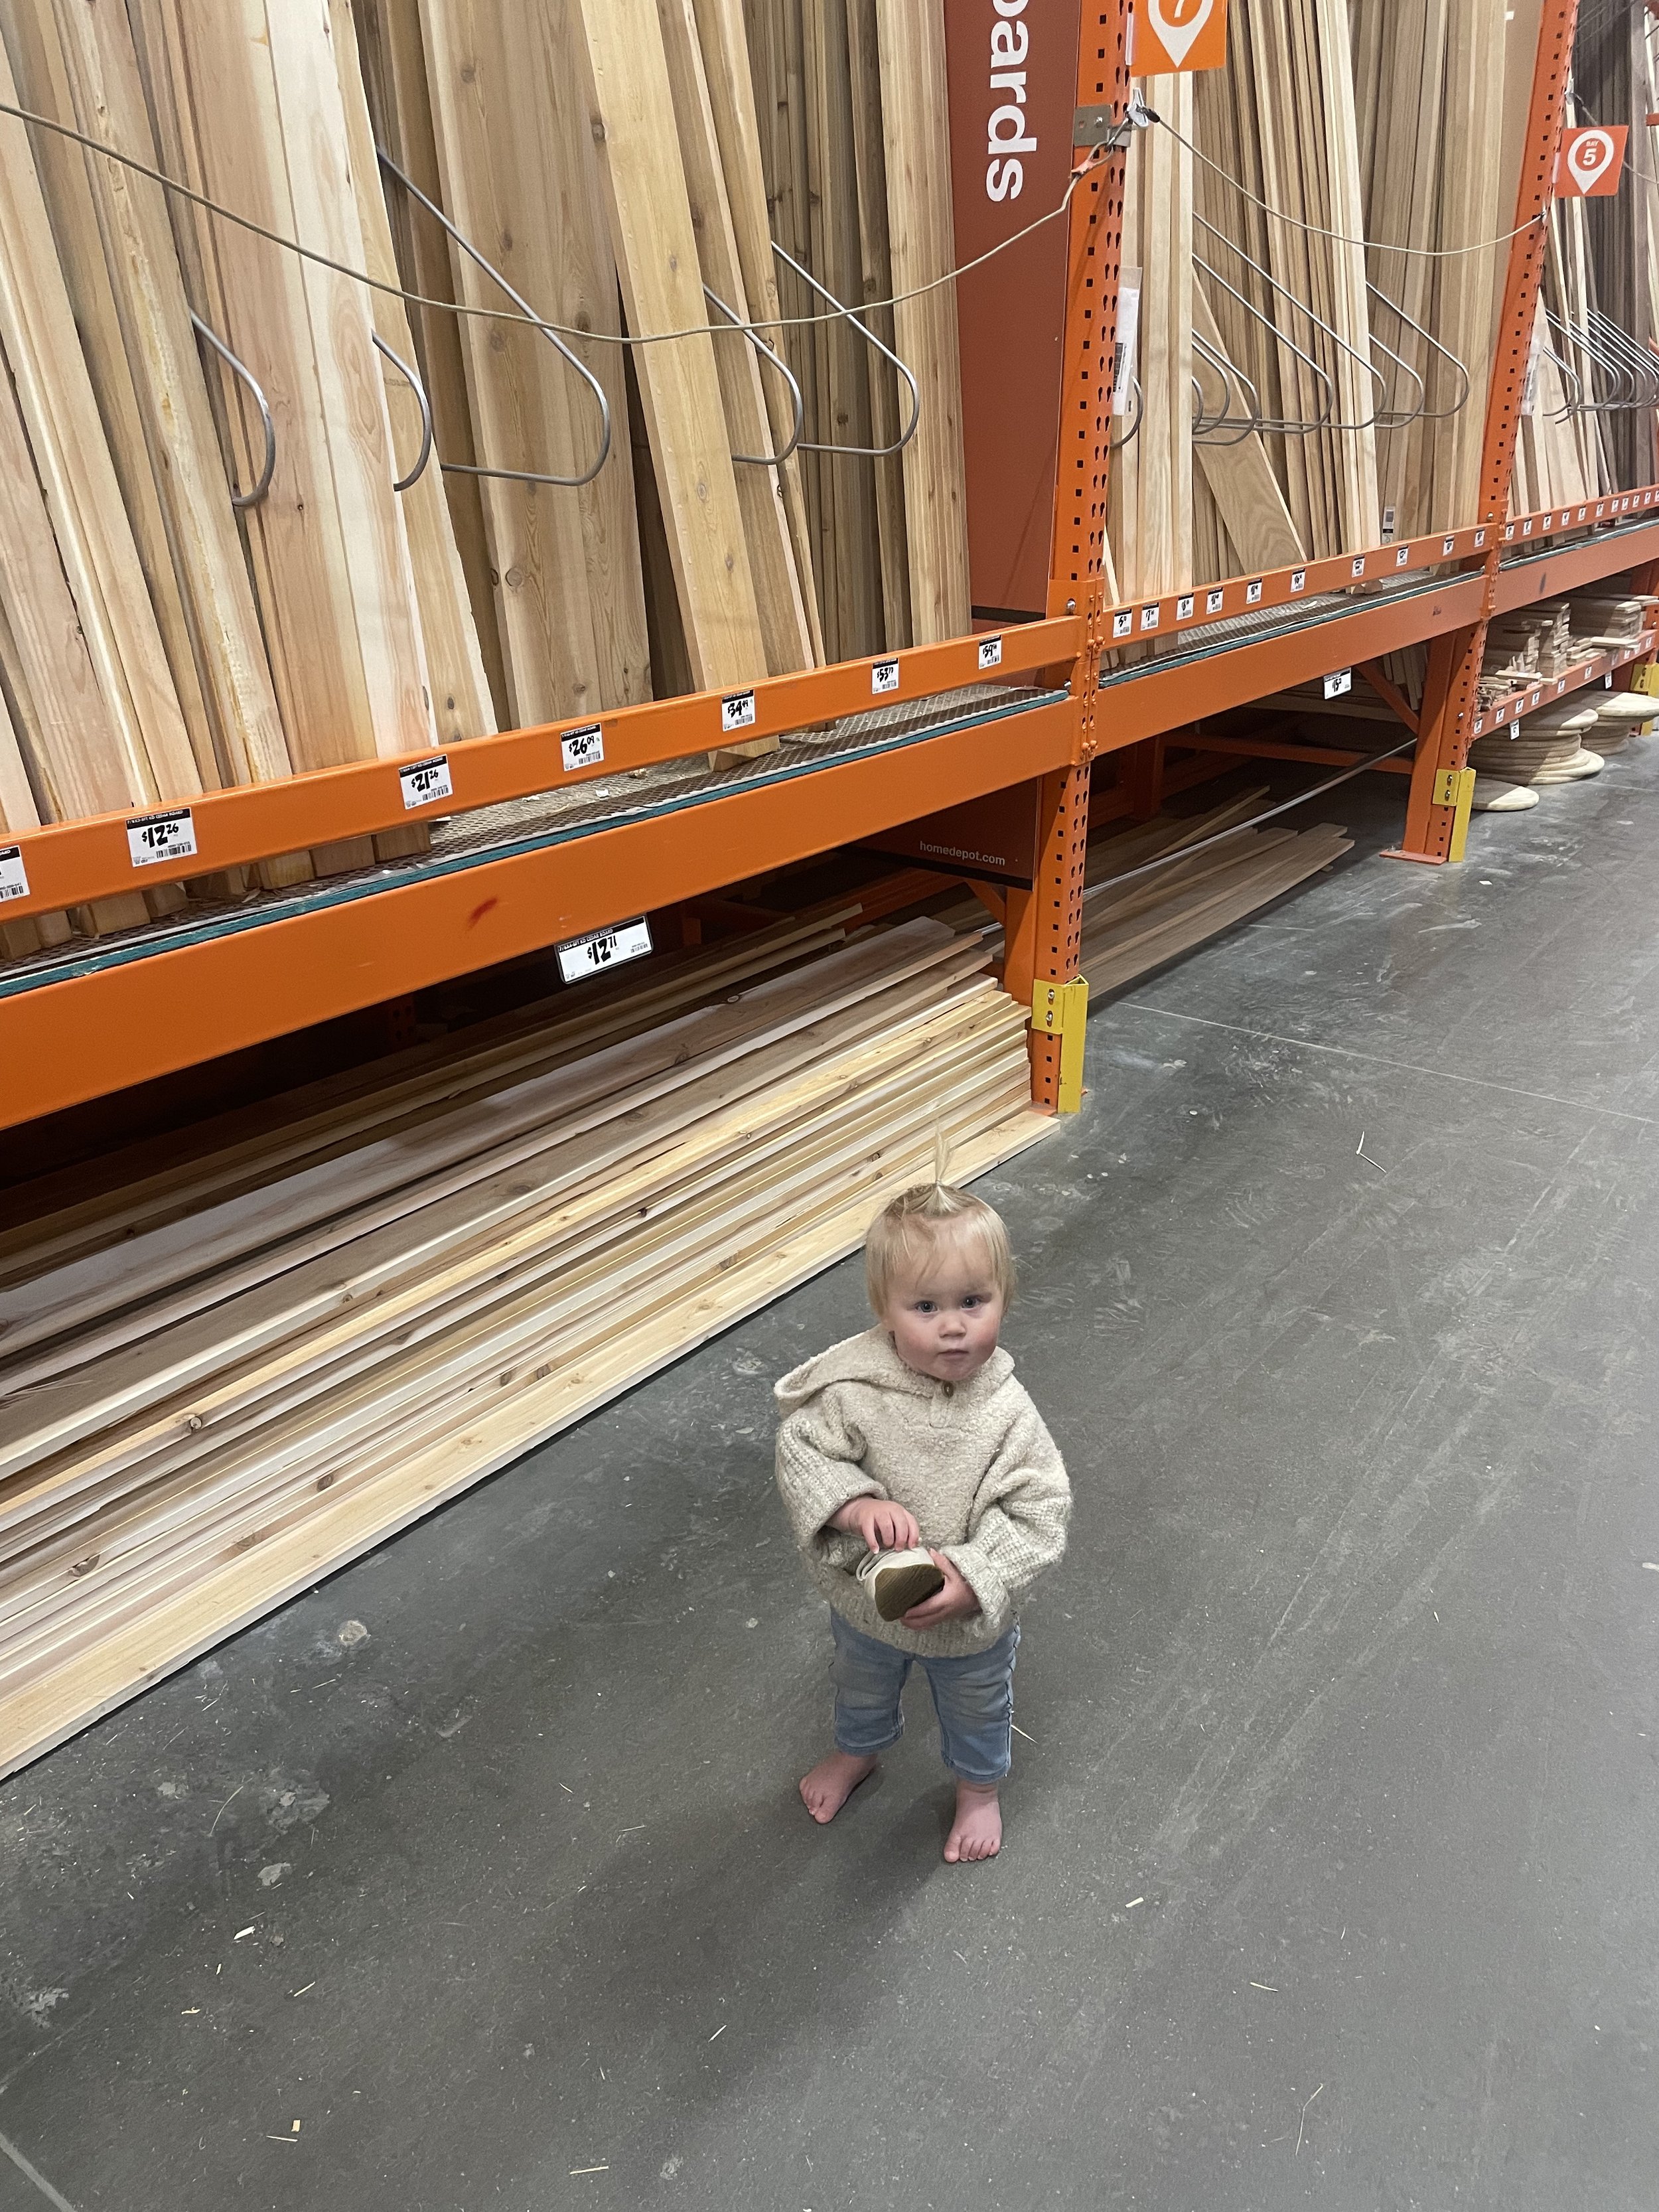
kyle & i did the project entirely on our own, & it was honestly so fun to get to work on together! it took us about 2 weeks total - we fit it in during Foster’s nap times & on weekends. i love dreaming up & doing home projects with him. it always takes a little bit of convincing on my end lol but he’s almost always down to tag-team a project. (& when i say tag team, it’s a bit more like me being his project assistant while wrangling a baby). she was a champ for many-a-home-depot runs!
WHAT WE DID:
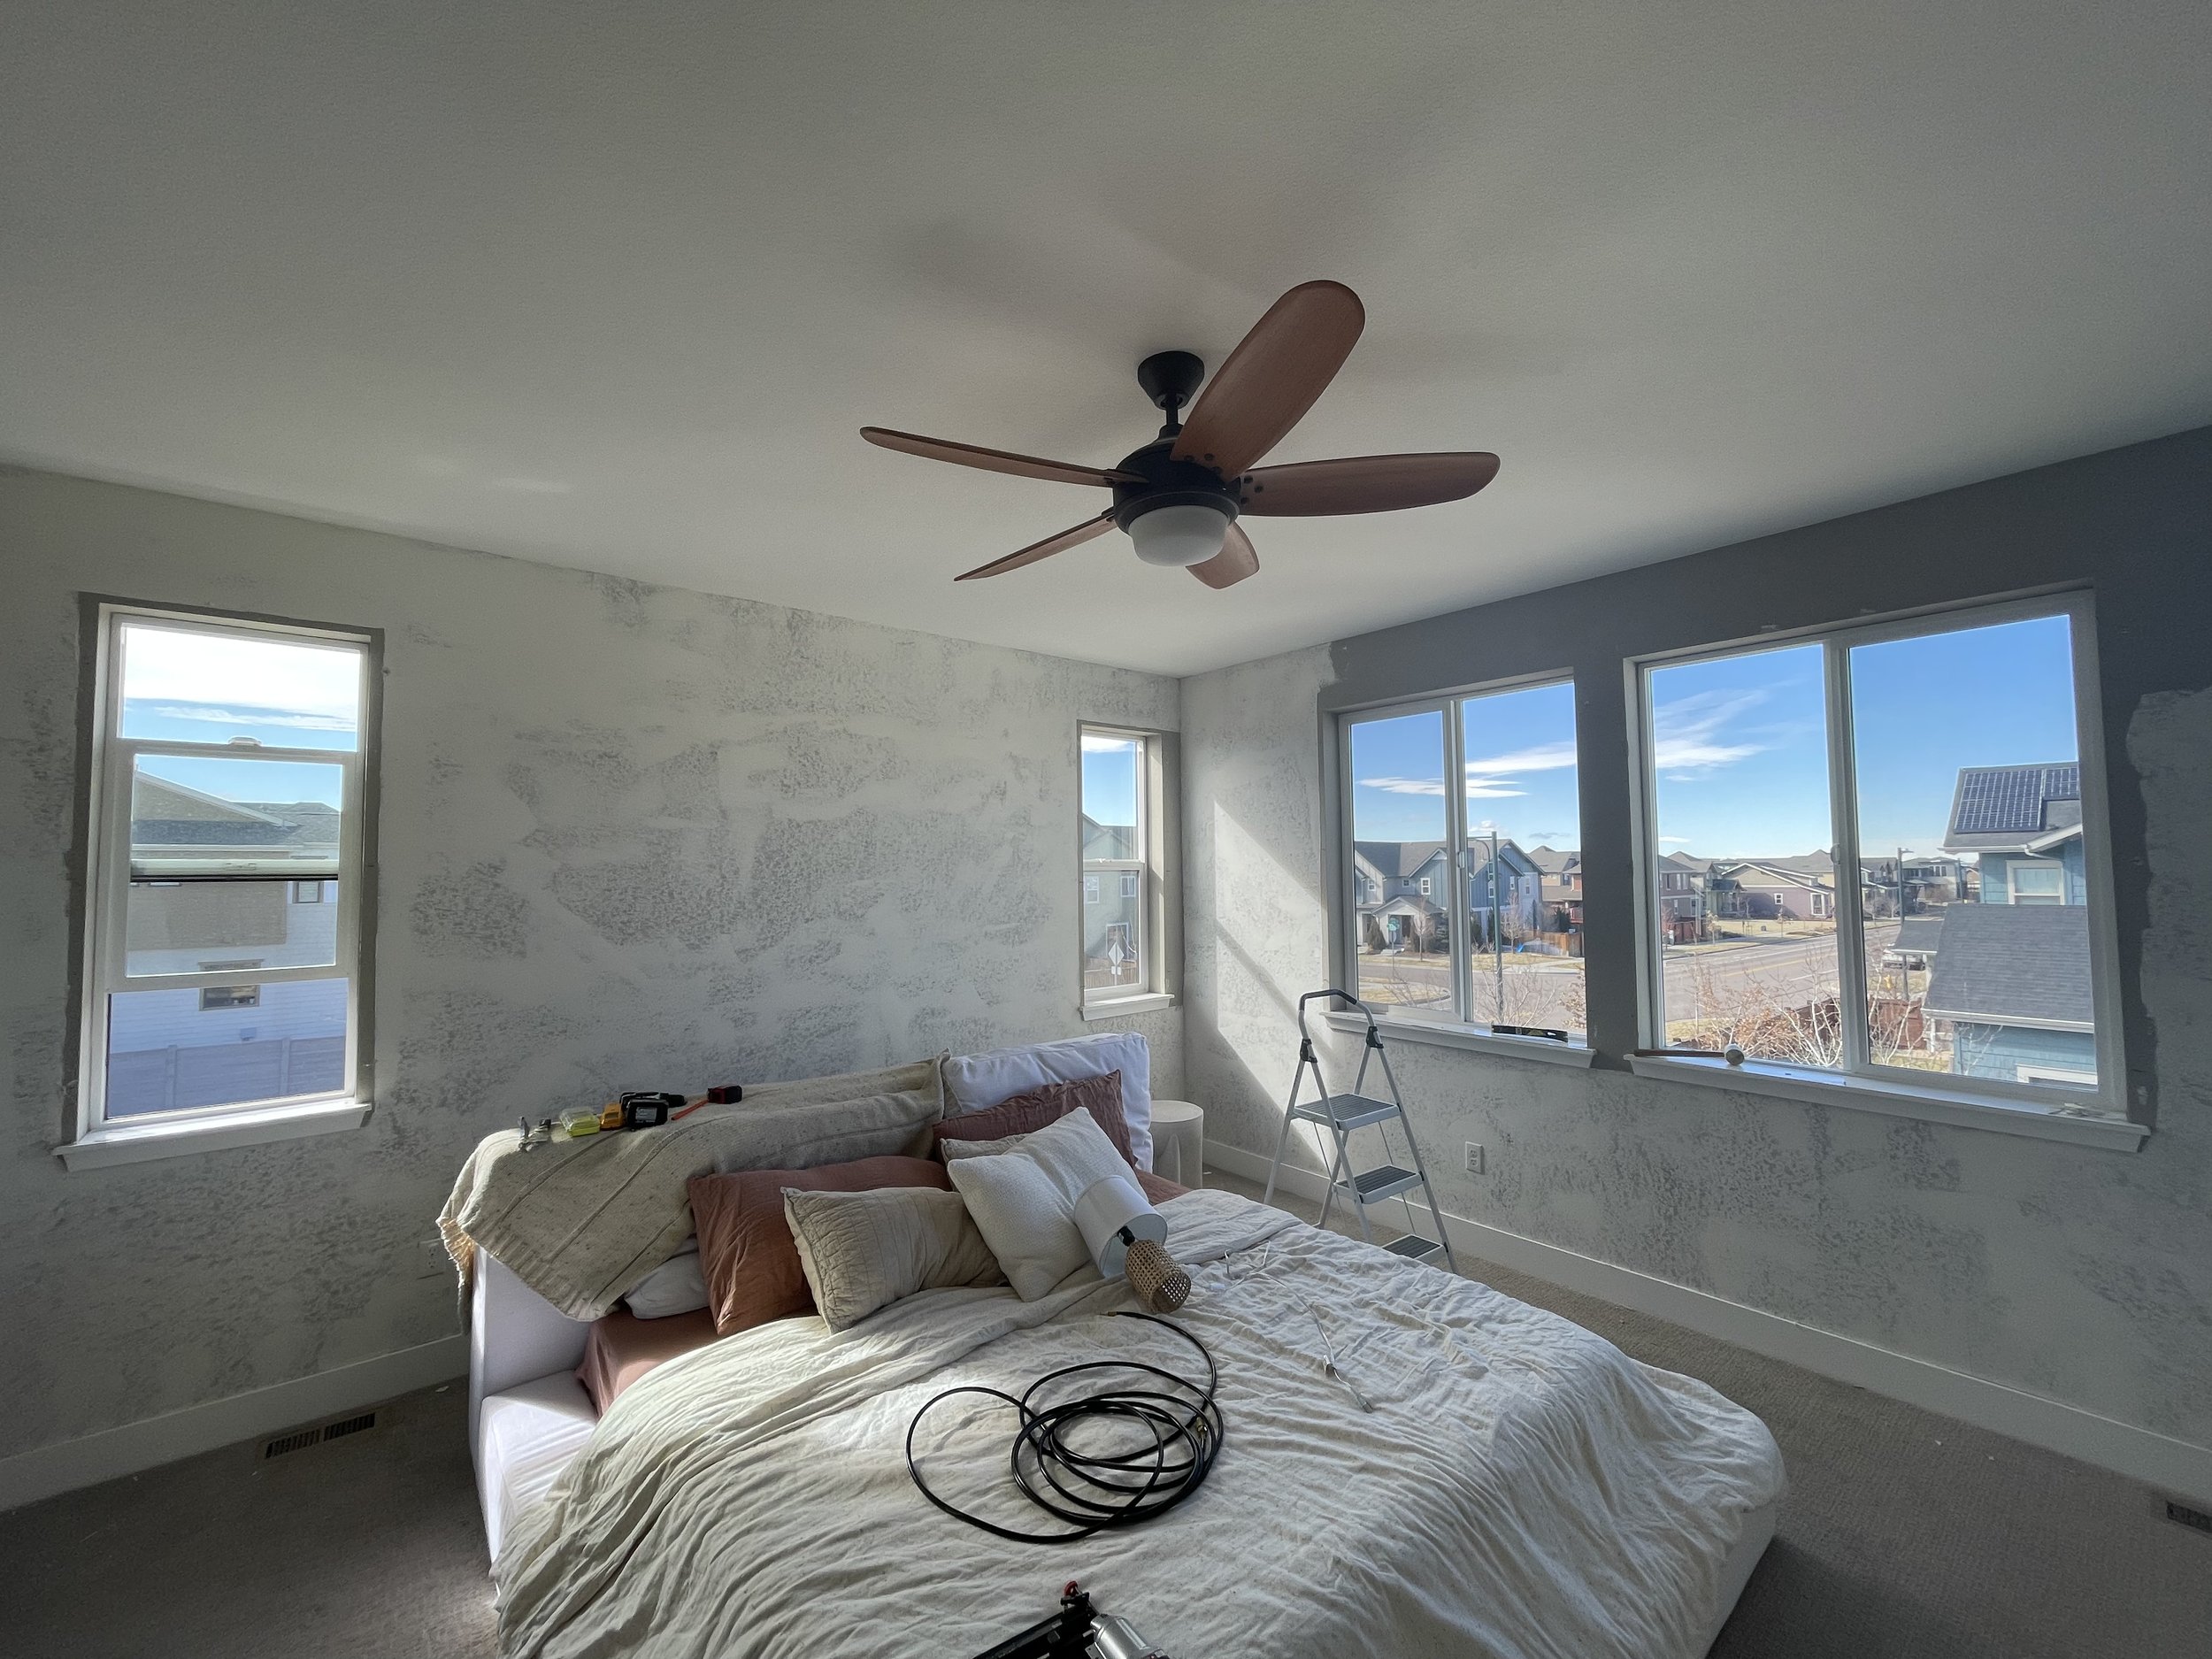
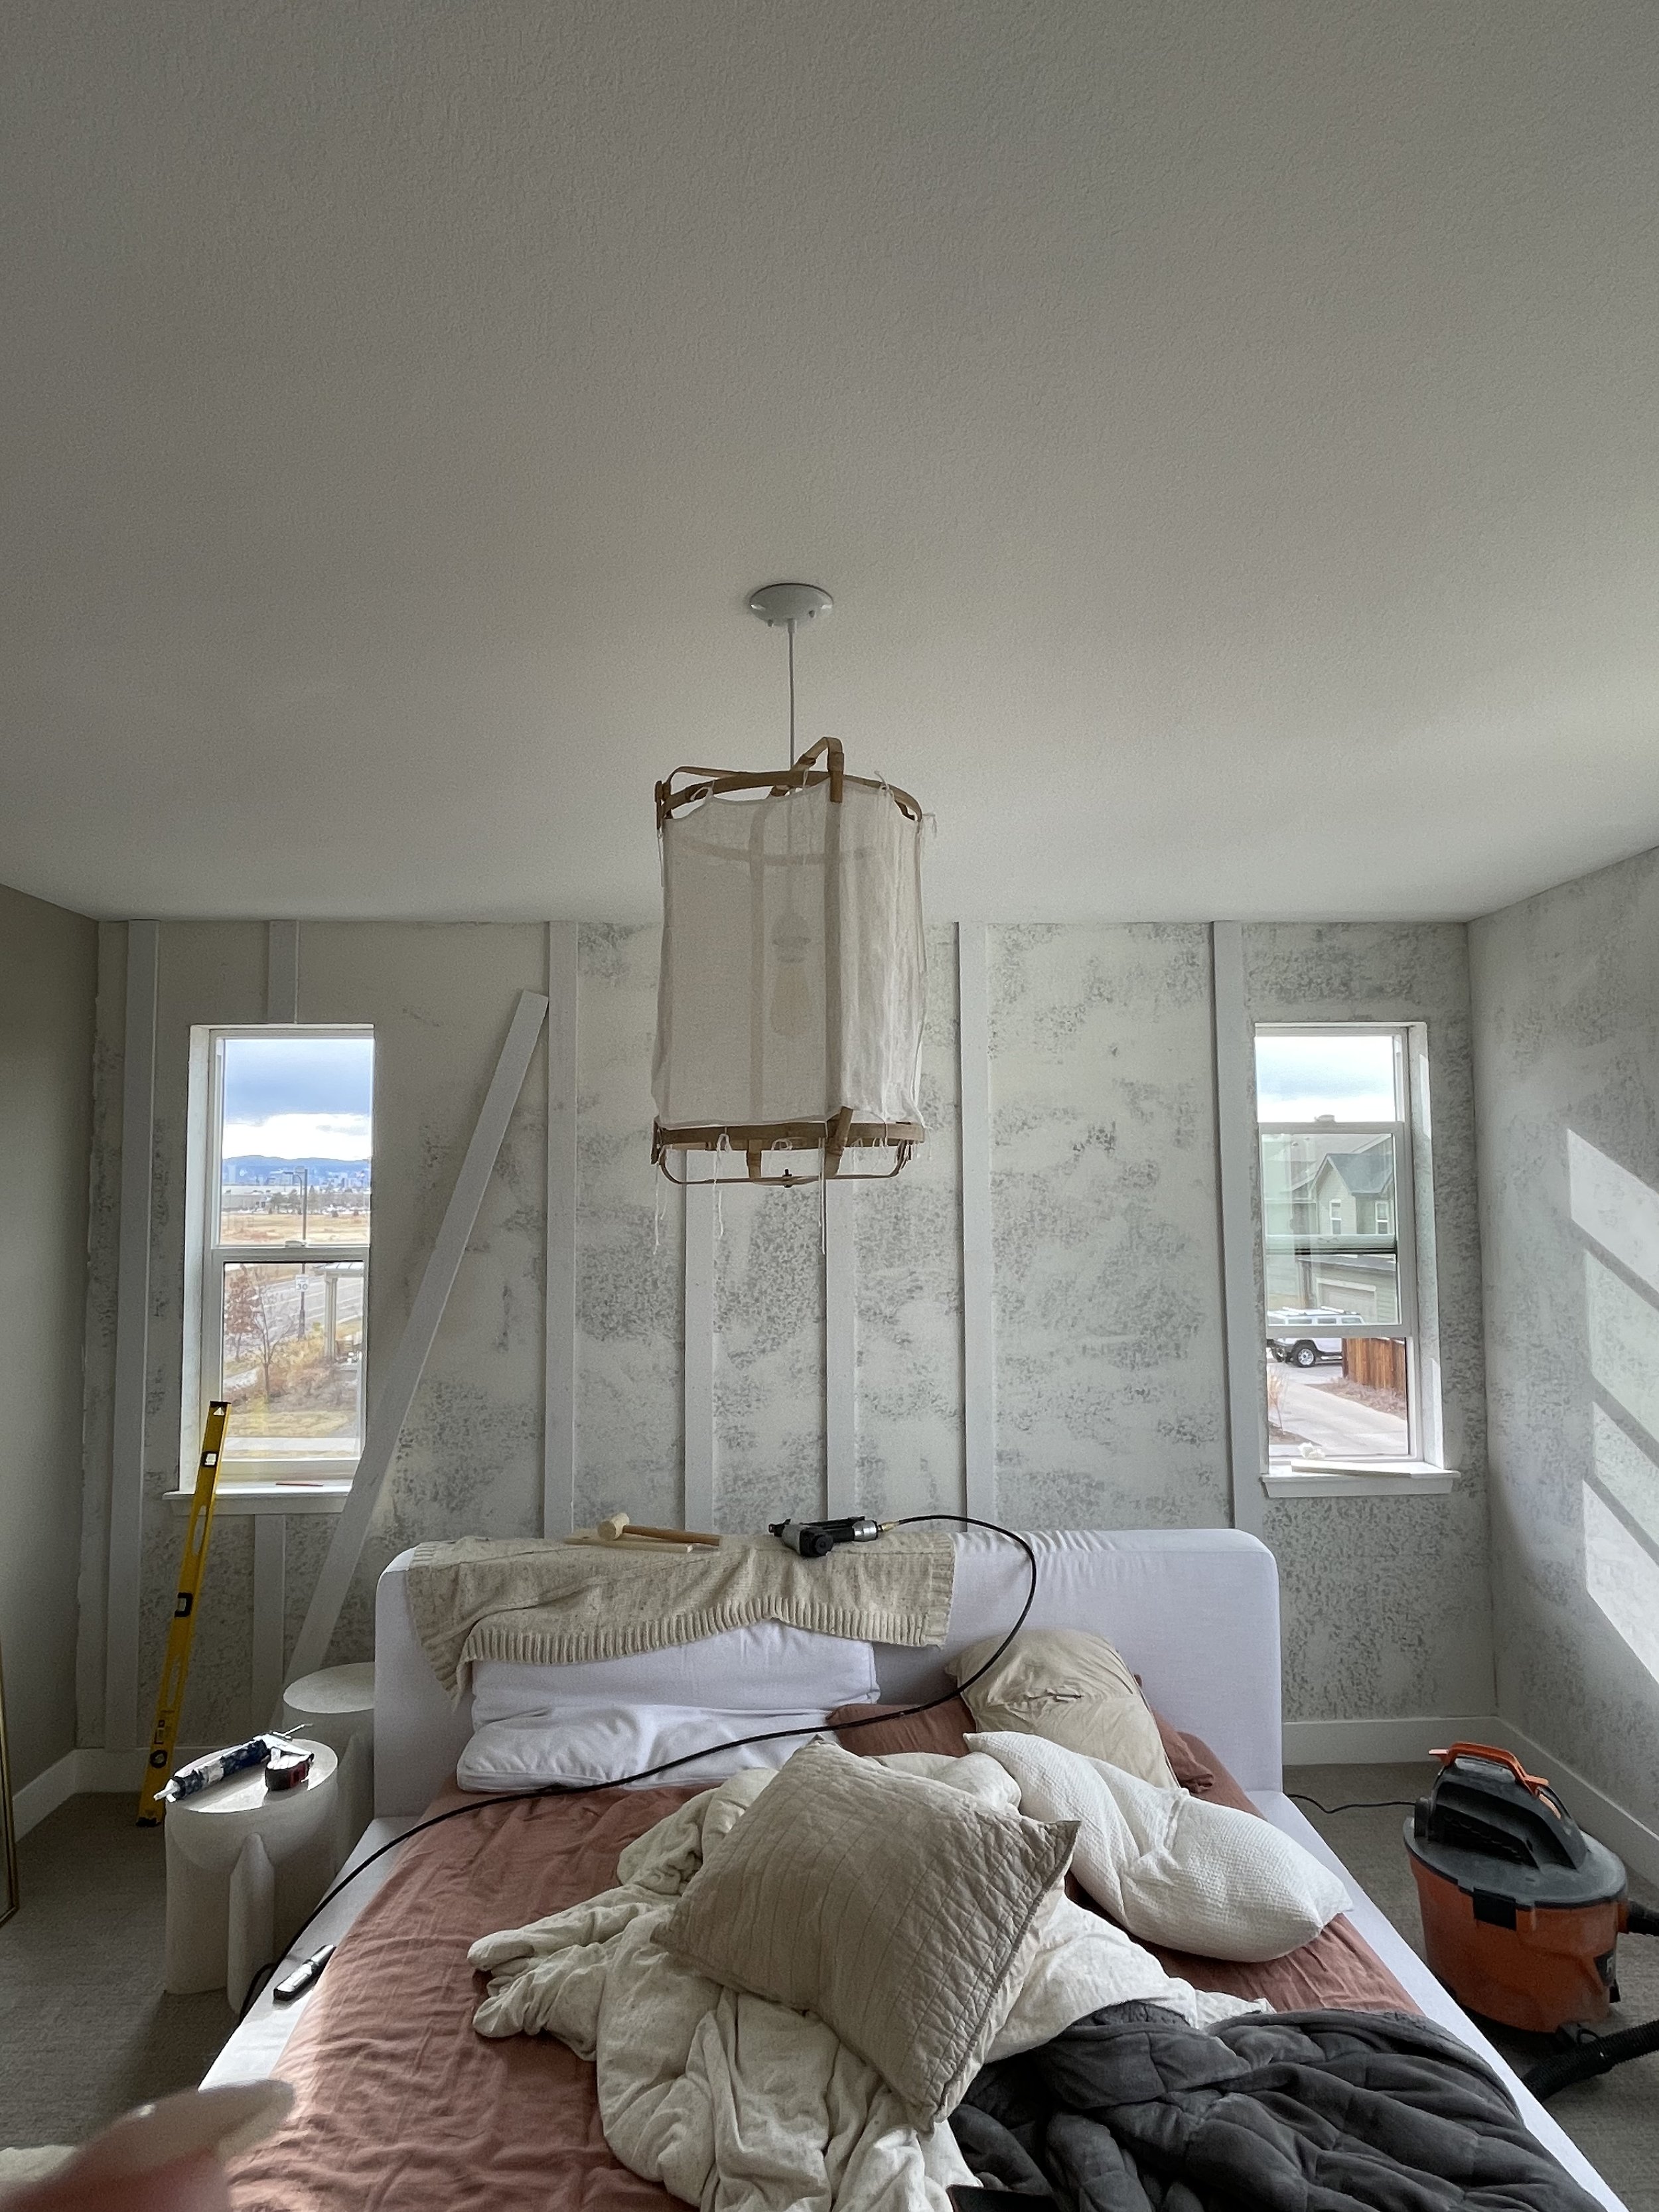
we started by smoothing out the knock down/orange peel texture on all the walls. this was pretty time consuming but 100% worth it for buttery smooth walls! we used a giant tub of joint compound from home depot + a few trowels. you have to apply it pretty thick (you’ll use more _____ than you think!). we actually had to do a light second coat because we didn’t put it on heavy enough the first time! once it dried, we sanded out any imperfections & then vacuumed the dust off so that paint would go on smooth. this is called “skim coating” & here’s a great tutorial on how to do it! she shows 2 ways to do it & we did the way her husband did it! this is the third time we’ve done this. here’s what it looked like in-process:
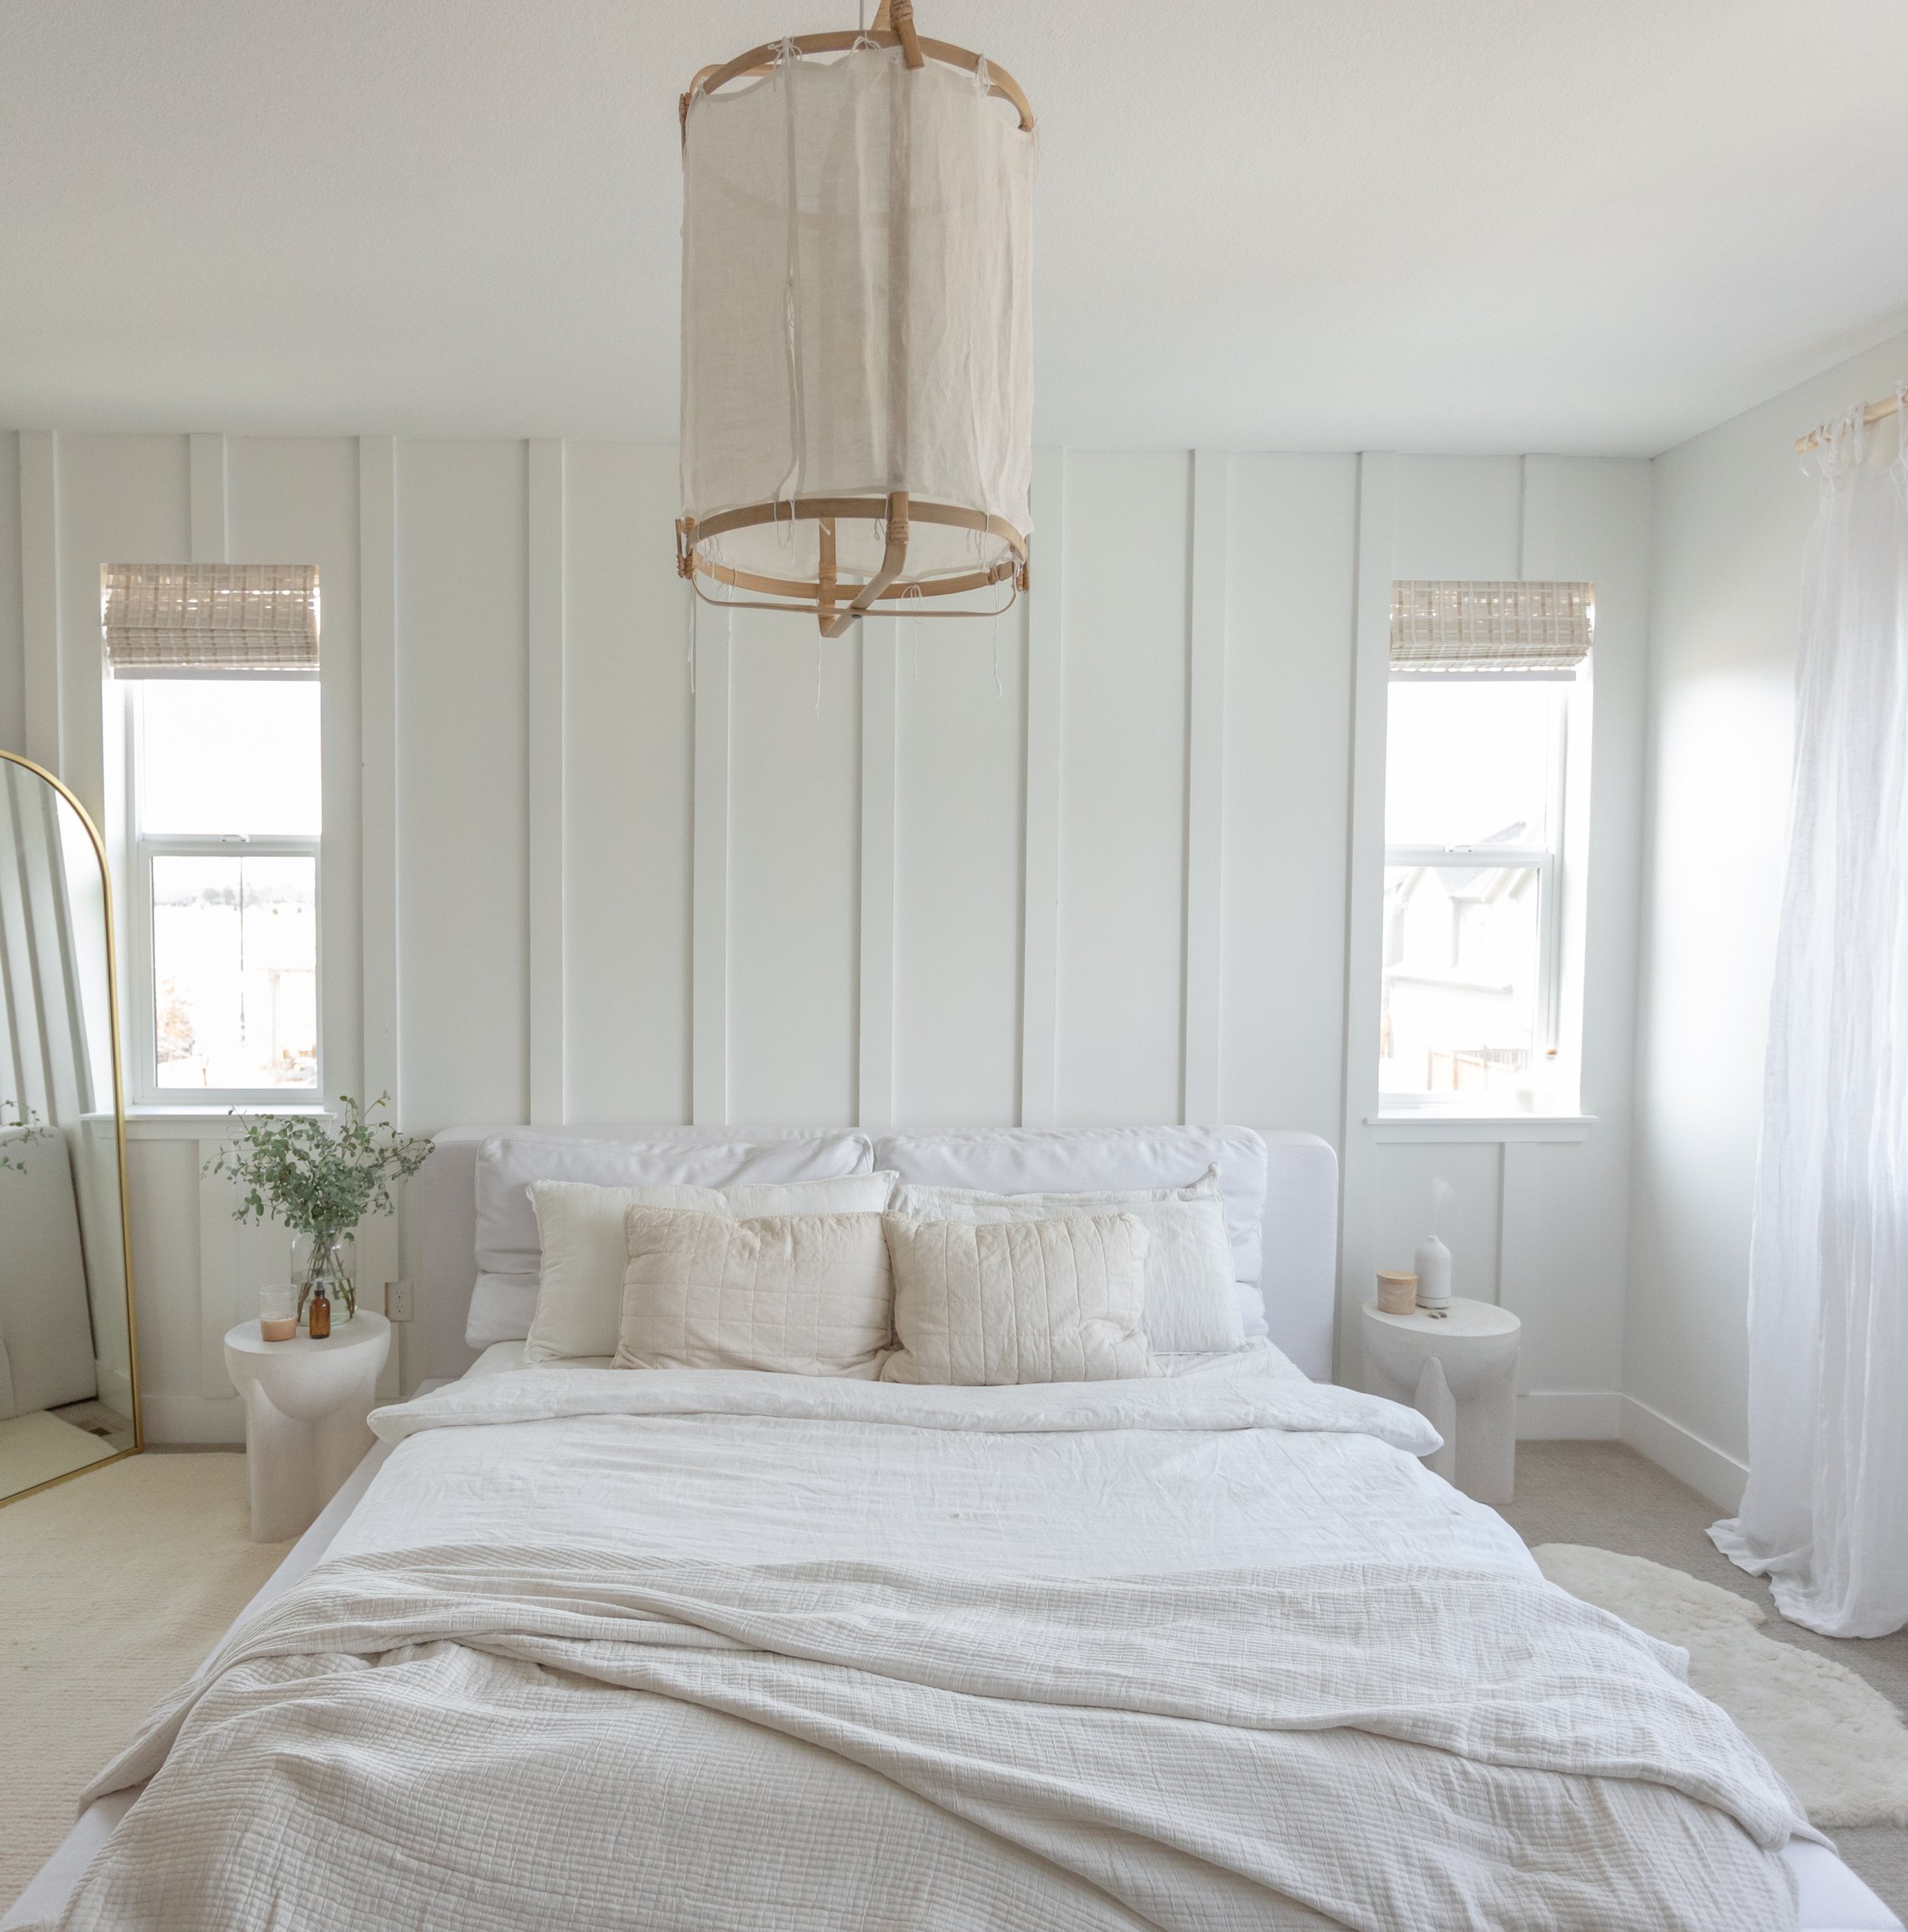
after the walls were smoothed, we created a board & batten accent wall for the wall our bed is against! i thought about shiplap or beadboard but i wanted to do something i hadn’t done before! plus, this was simpler. i used 4 inch wide common boards (pine) & we cut them to size, & used a nail gun + liquid nails to adhere them to the wall! we spaced them about 16 inches apart from one another. we then filled the nail holes with putty, sanded them & got to painting. here’s a super thorough board & batten tutorial if you’re needing more visuals!

then we moved onto priming & painting! we used the color ‘whipped’ from Clare Paint which turned out to be the PERFECT creamy white! there are very minimal warm undertones, which is my preferred white. lots of other white paints pull too much blue in my opinion. we also used clare primer underneath, & for supplies…i snagged their 7-piece paint set which was perfect! that roller material was the best roller i’ve ever used! the paint applied soooo easily. they highly recommend doing a first coat with the primer & i’m very very glad we did.
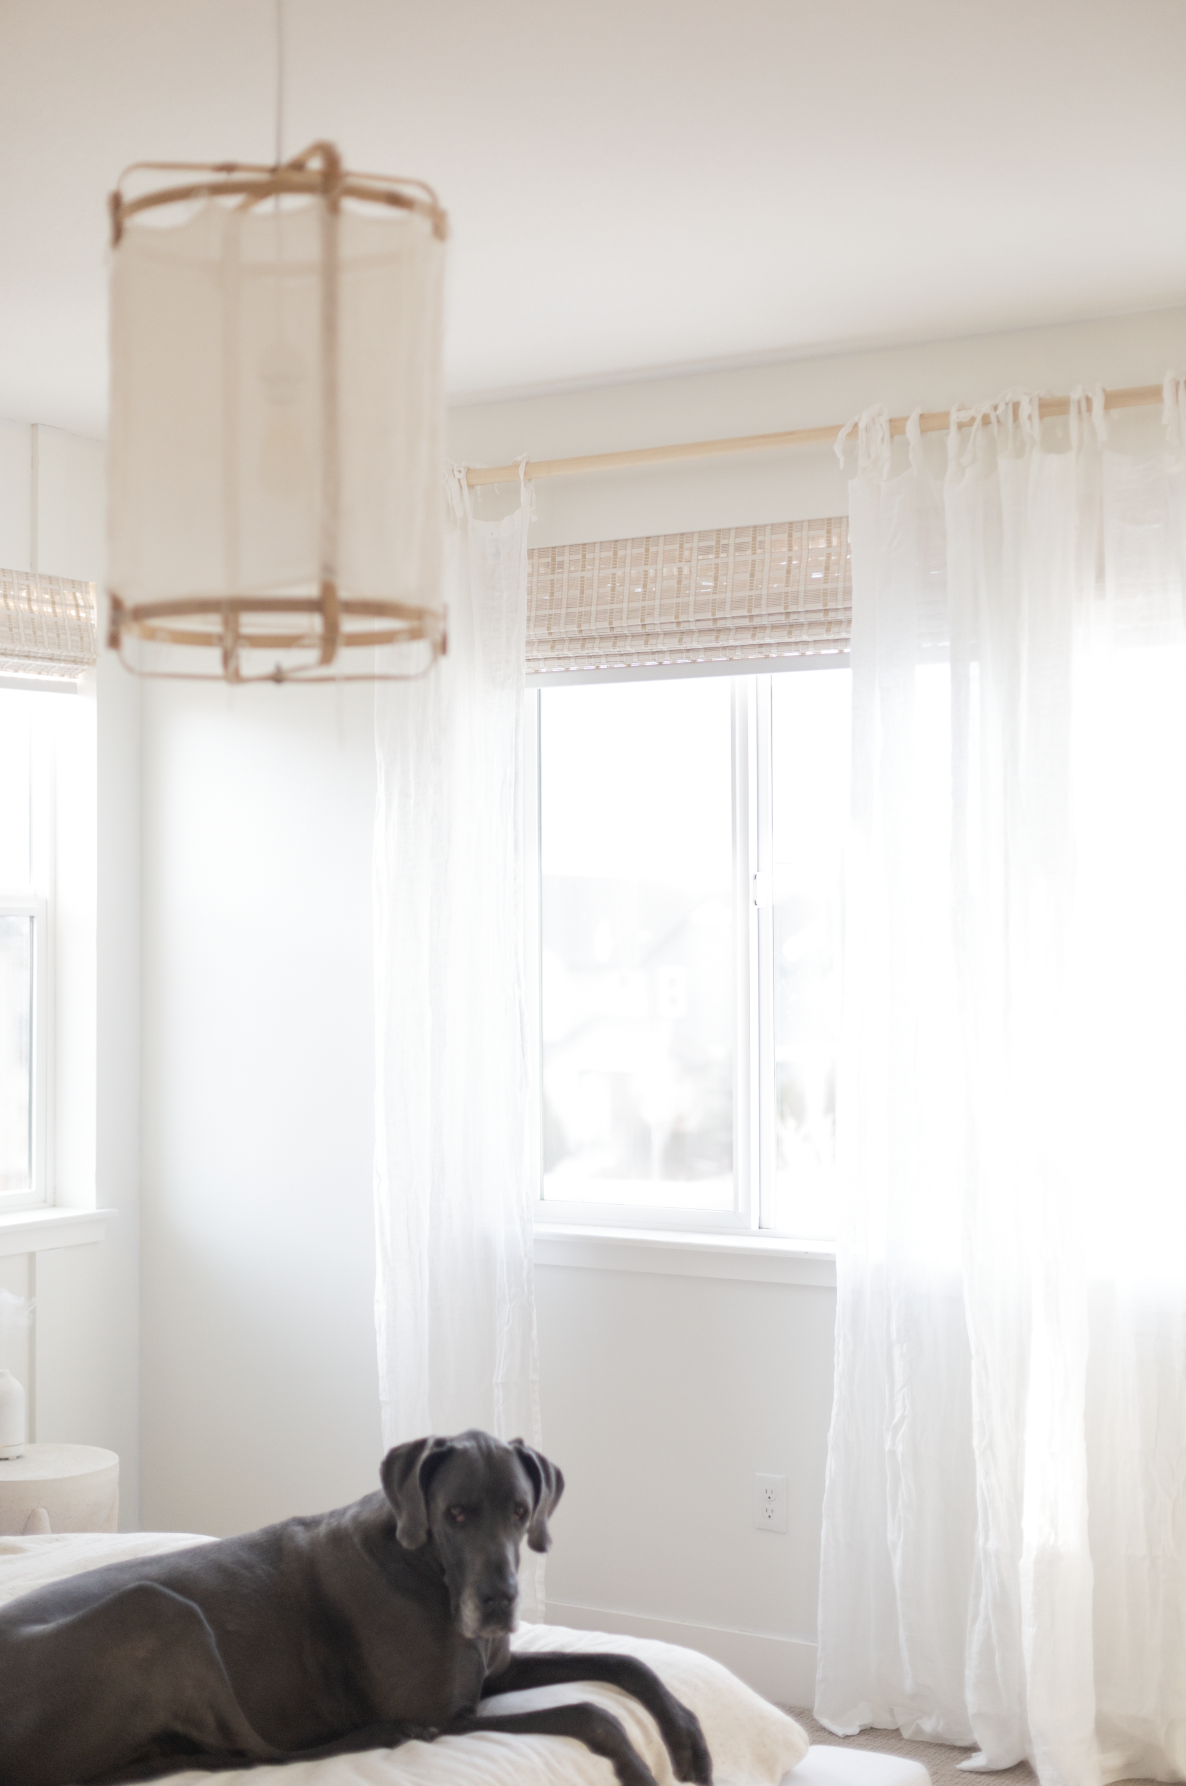
when we moved in, there were plantation shutters on all the windows. they are really beautiful & amazing quality but they just weren’t exactly the vibe i was going for, so we replaced them with these woven bamboo blinds & i looooove how they turned out! the color & texture of the blinds adds an airy coastal element to the space. then we installed these h&m linen curtains over the top (using my fave dowel curtain rod hack). they don’t block as much light as blackout curtains would, but the light-blocking is still pretty good with the blinds & curtains together! i personally do NOT like a very darkened room because it makes it harder for me to wake up! but i also wanted something to mostly block out the street lights & lights of cars driving by

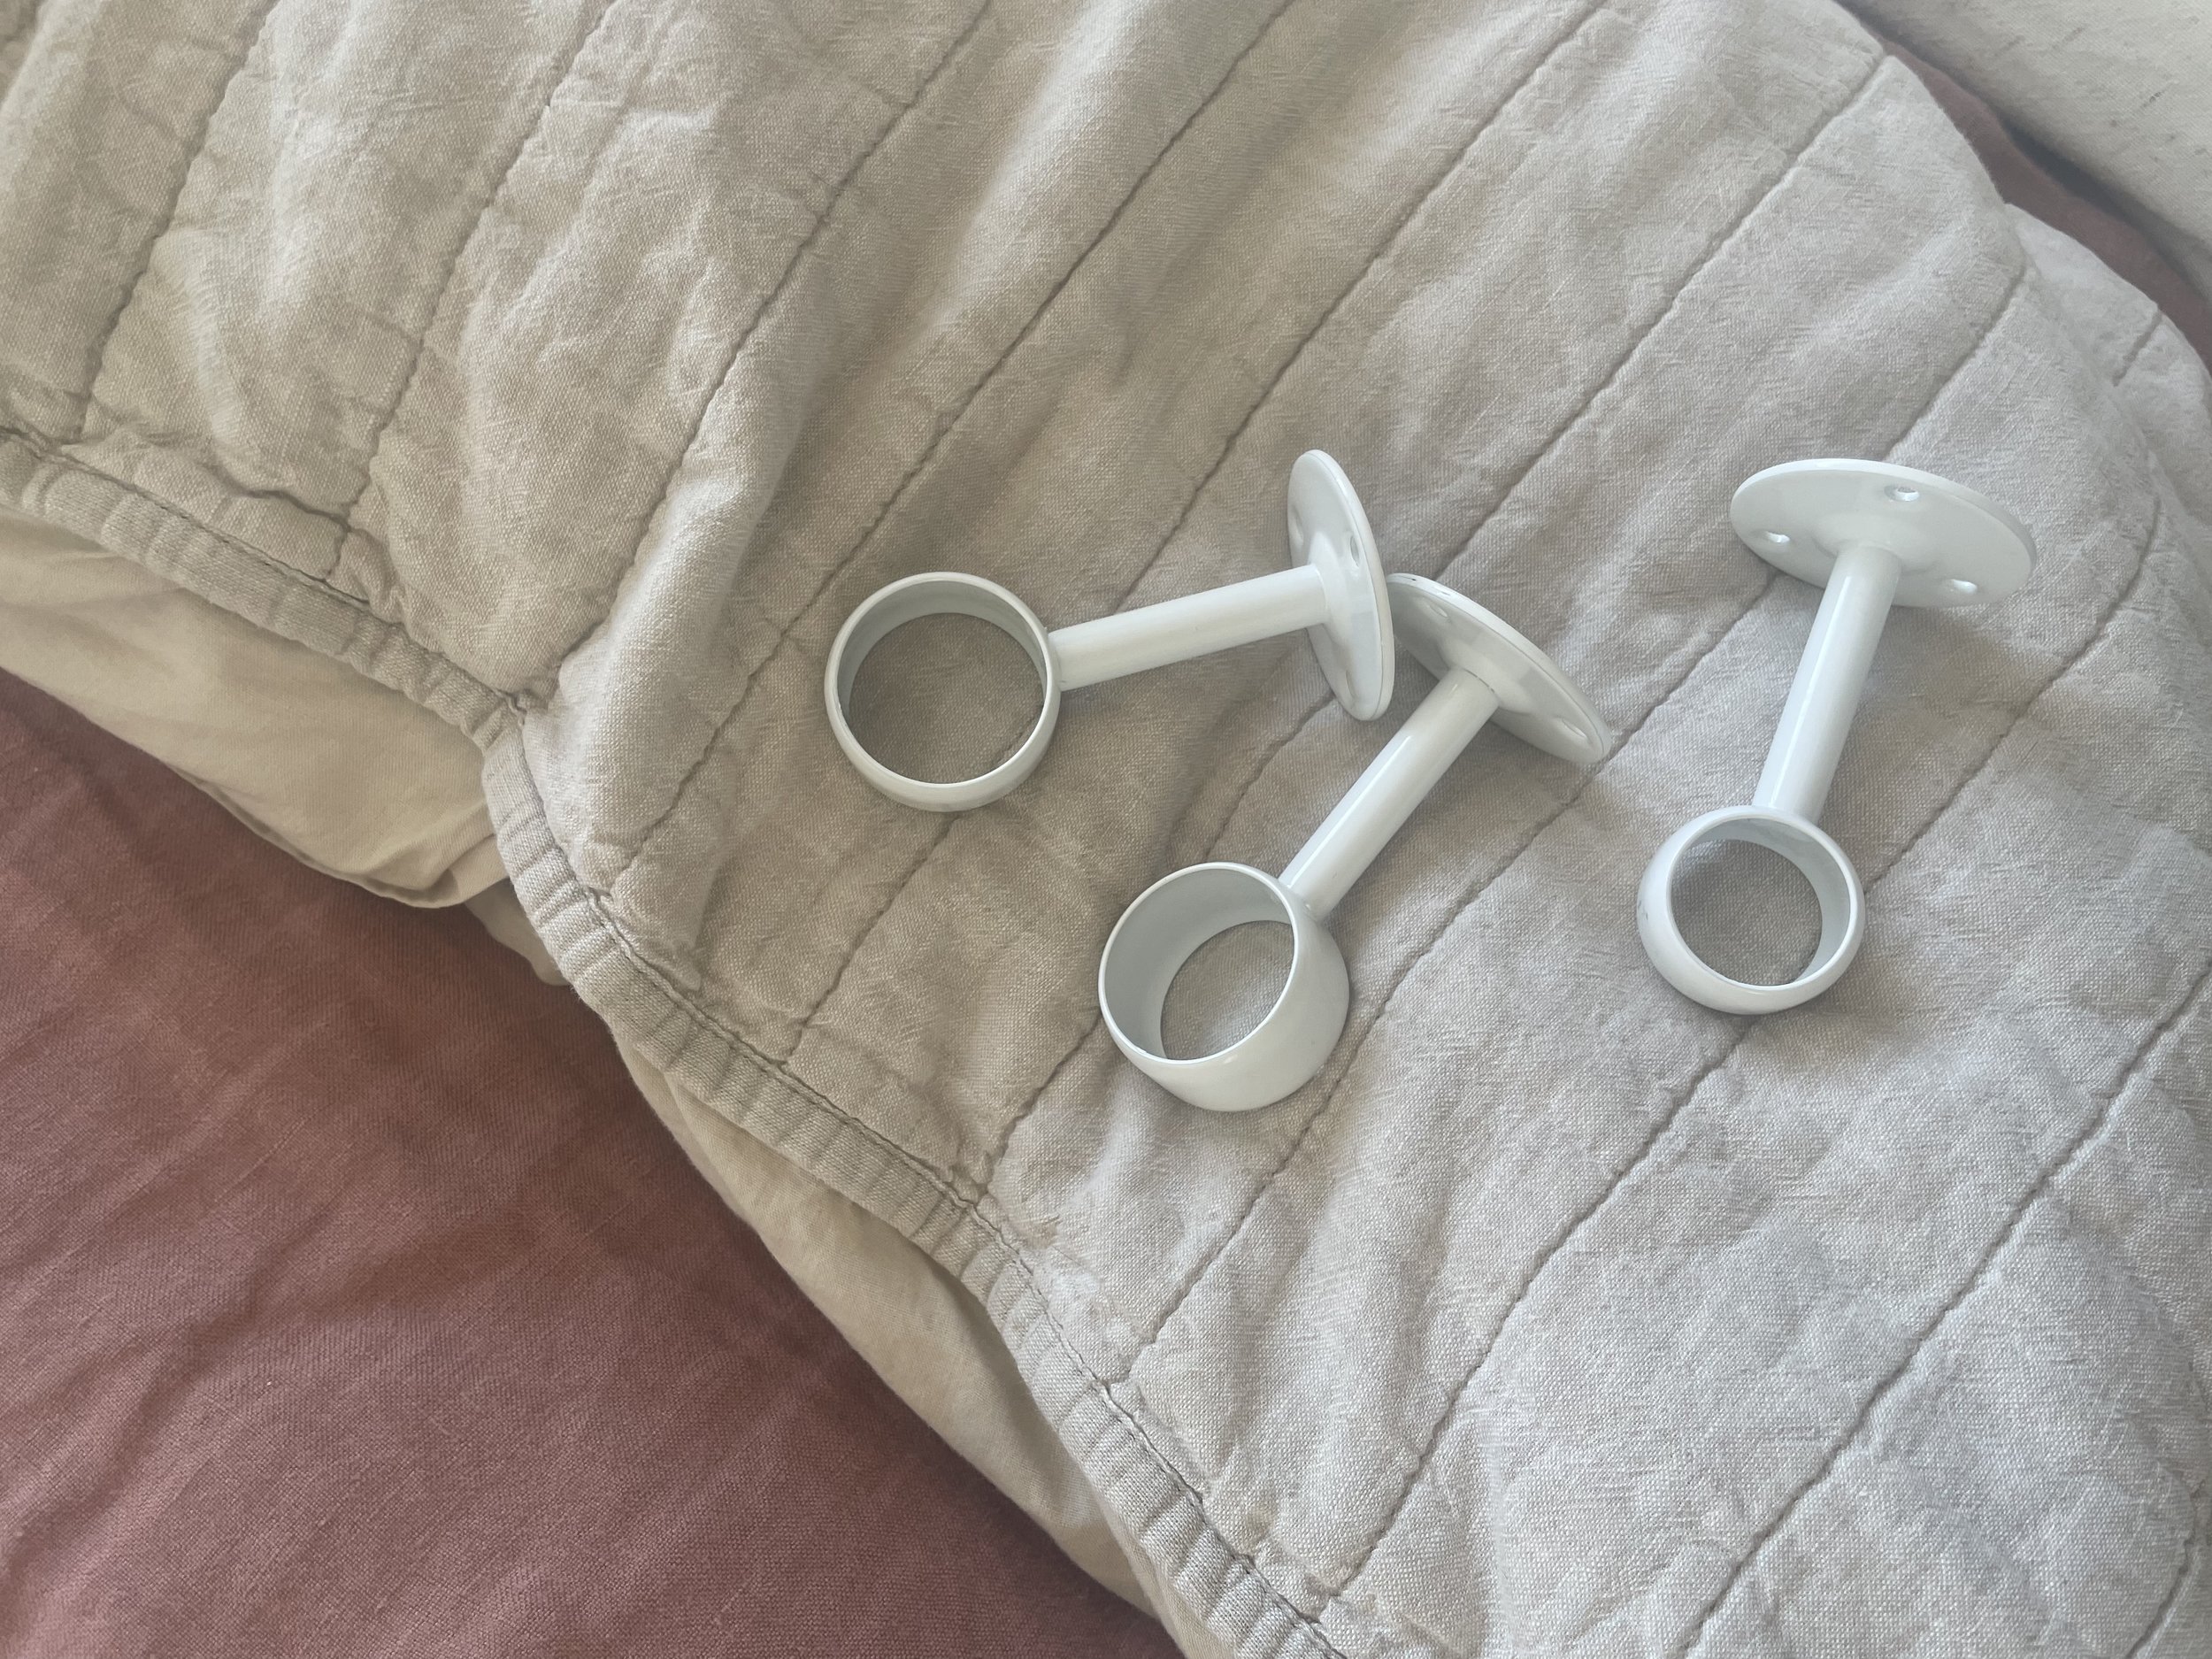
^ these are the curtain rod holders i used! they were sooo cheap from amazon. i accidentally got a dowel rod too wide for the holders so kyle cut them & opened them up a bit which worked perfectly! we just positioned the slit towards the ceiling so you can’t even see it! i wanted one continuous rod for the wall so we actually combined two dowel rods. we didn’t glue them or anything - just made the middle points meet at the middle bracket.
real talk…i’m absolutely obsessed with our bed! it’s the sundays movie night bed, & it makes me feel like i’m sleepin’ in a CLOUD. the vibe is PERFECT for this room, & i love that it sits low to the ground! it comes with two back pillows in the same fabric, which are mega comfy, & the wide sides also make perfect snack & book rests ;) (code ABIGAIL10 gets you 10% off on the Sundays Furniture site!) we’ve had it for 6 months now & it’s held up amazingly well, even with 2 dogs that often sleep in bed with us! the back cushion covers are washable & i just use the pet/fabric attachement on our dyson to vaccum it + spot treat it as needed.
& finally, because you know i’m linen obsessed….i linked allll the linens below, + a ton are also linked in my parachute must-haves blog post!
WHAT’S NEXT:
in the next couple month’s i’m going to add a 10x14 rug, a glider chair, long bench & wood shelving on the wall across from our bed ! & in the future (or sooner…lookin’ at you kyle green!) i’d love to remove the carpeting & replace it with warm toned, wide wood planks, as well as add a couple reclaimed wood faux beams on the ceilings! so technicallyyyyy the room is not at all done hahaha but it’s in a great starting place!
this project has been so much fun, & i’m so glad i got to take you along for the ride!
links to everything mentioned/shown:

clare paint (color - whipped) / clare paint primer / clare 7-piece paint set / sundays movie night bed (use code ABIGAIL10 for 10% off) / bamboo blinds / white linen curtains / linen + bamboo pendant light / stone nightstand / west elm arch mirror / wool blend rug / duvet cover / parachute linen box quilted shams / parachute linen pillowcases / ikea fado table light
drop any questions you have in the comments!